Quick Start
After downloading and installing Musicnizer, you can start the program directly from its setup. Alternatively, just double-click its label on your desktop.
Demo Database
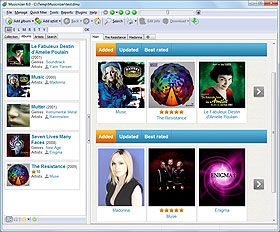
The music organizer is distributed with a small demo database. It may look like this:

You can click on various links in the database, add new albums and artists, download information, and so on, to explore features of the program.
Your Own Music Database
Once you decide to organize your music albums, start with creating a new database. Select "File" - "New database":

A typical "Save as" window will pop up:

Musicnizer stores its demo database in the "Musicnizer" subfolder of your Documents folder. This is where it suggests to save your new database, too. However, you can select any other folder on your computer (just do not use "Program files" or other system folders).
Enter some name for your database into the "File name" field. In our example, it's "my-music".
Click "Save" to create your new music database.
All previously entered information will disappear from Musicnizer, including the demo albums and artists. Of course, it hasn't been deleted, we can switch to the demo database again using the "Open database" or "Recent databases" items in the "File" menu. But our new database is completely clean, and we can start adding our own albums.
Add Music Albums
Click the "Add album" button on the toolbar of Musicnizer:
![]()
The "Add album" wizard will appear:

You can add albums in 4 different ways:
- By title.
- By barcode.
- From Audio CDs.
- From files and folders.
For this example, we use the first option. Enter an album title into the big white field below the 4 options. You can enter several titles at once, one title per line.
Click "Next".
Musicnizer sends a request to the currently selected online music database and displays a list of search results:

Find the title you are adding in the list and double-click it to download information about the album. Alternatively, you can click the title once and click the "Next" button in the lower part of the window.
If there are no results, you can verify your title (is it correct?) and try using a different music database.
After downloading information, Musicnizer displays the "Edit info" window for the album. Here you can check and edit the downloaded information before saving it into your database.

If something is wrong, you can click "Cancel". No information will be saved into your database.
Otherwise, just click "Save".

The new album has been added to our database.
We can add further albums in the same way. Additionally, we can click on the artist's name and download information about the artist, including a description / biography, discography, photos, etc.
After adding your albums, you will be able to sort and search them in different ways, play audio files in Musicnizer, and more. Just refer to the "Features" and "Articles" pages for more information and usage examples.